
Vinyl Graphics: Nailing That Perfect Look Without the Headaches
Ever tried to slap a cool decal on your car or jazzing up your shop window, only to end up with a bubbly mess? Trust me, we've all been there. Vinyl graphics can be a game-changer for personalizing your ride or giving your business some extra flair. But let's face it - getting them on just right can be trickier than it looks. No worries, though! I've got your back with some tried-and-true tips to help you avoid those facepalm moments.
First Things First: Prep Like a Pro
You know how they say a clean canvas makes for better art? Same deal here. Before you even think about peeling that backing off, make sure your surface is squeaky clean. I'm talking no dust, no grime, nada. A quick wipe-down with some rubbing alcohol usually does the trick. Oh, and pro tip: smooth surfaces are your best friend. Trying to stick vinyl on something bumpy? That's like trying to ice a cake with pebbles on it. Not fun.
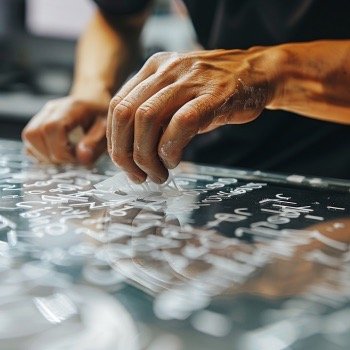
Tool Time: Gear Up for Success
Ever tried spreading peanut butter with a fork? Yeah, using the wrong tools for vinyl is kinda like that. Grab yourself a good squeegee - it's a lifesaver for smoothing out those pesky air bubbles. And don't forget about transfer tape. It's like a wingman for your vinyl, helping it make a smooth move from the backing to your surface.
Measure Twice, Stick Once
Remember that time you eyeballed hanging a picture frame and ended up with a wall full of holes? Let's not repeat that with vinyl. Take a minute to measure things out and maybe even do a dry run. Trust me, your future self will thank you when everything lines up perfectly.
The Main Event: Applying Your Vinyl
Alright, here's where the magic happens. Start peeling that backing off slowly - we're not ripping off a Band-Aid here. For those bigger pieces, try the hinge method. It's like having a spotter when you're lifting weights - keeps everything aligned and under control.
Bubble Trouble? No Sweat!
Spotted some air bubbles? Don't panic! For the little guys, a tiny poke with a pin and a smooth over with your squeegee will do the trick. Got a monster bubble? Gently lift the vinyl and try again. Remember, slow and steady wins the race.
The Home Stretch
Almost there! A little heat from a hair dryer can help your vinyl really snuggle into place. Just don't go overboard - we're warming it up, not cooking it. And for that pro finish, trim any excess with a sharp blade. Careful though, we're not aiming for a new paint job here!
Rookie Mistakes to Dodge
Look, we've all been there - trying to rush through a project because Netflix is calling our name. But trust me, taking your time with vinyl pays off. And while we're at it, always do a test run on a small area first. It's like sampling the soup before serving it to your in-laws - always a smart move.
Wrapping It Up
Applying vinyl graphics might seem like rocket science at first, but with these tips in your back pocket, you'll be a pro in no time. Remember, it's all about prep, patience, and the right tools. Before you know it, you'll be the go-to vinyl guru in your circle. So go ahead, give it a shot! Your newly decked-out car/window/wall is waiting to make jaws drop.
Got any vinyl victory stories or epic fails? Drop 'em in the comments below! We're all in this sticky situation together, after all.