Vinyl Plotters: Your Secret Weapon for Awesome Sign Making
Introduction
Ever walked past a storefront and marveled at those sleek, professional-looking signs? Chances are, they were made with a vinyl plotter. Whether you're a sign-making pro or just dipping your toes into the craft, these nifty machines can take your work from "meh" to "wow!" So, let's dive into the world of vinyl plotters and uncover how they can transform your sign-making game.
What's a Vinyl Plotter, Anyway?
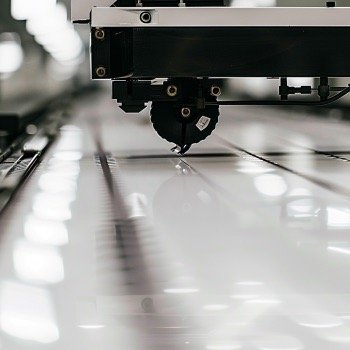
Think of a vinyl plotter as a super-precise, computerized scissors. It slices through vinyl sheets like a hot knife through butter, creating shapes and letters that'll make your inner perfectionist swoon. It's the go-to tool for crafting signs, decals, and all sorts of eye-catching graphics.
Why Bother with a Vinyl Plotter?
Good question! Here's why vinyl plotters are worth their weight in gold:
Precision that'll make your eyes pop
Speed that'll give The Flash a run for his money
Versatility that puts Swiss Army knives to shame
Getting Started: Your Vinyl Plotter Adventure Begins
1. Choosing Your Plotter Sidekick
Picking the right plotter is like choosing a wand at Ollivanders - it's got to be the perfect fit. Consider what you'll be working on, how complex your designs might get, and of course, your budget. Popular brands like Roland, Cricut, and Silhouette are solid choices to start your search.
2. Setting Up Shop
Once you've got your plotter, it's time to bring it to life:
Assemble it (no IKEA-level frustration required, promise!)
Hook it up to your computer (it's basically just fancy plug-and-play)
Install the software (follow the instructions, and you'll be golden)
3. Vinyl Loading 101
Getting your vinyl loaded right is crucial - think of it as the foundation of your sign-making masterpiece. Line it up carefully, and use those pinch rollers to keep everything in place. Trust me, a little extra care here saves a ton of headaches later!
Designing Your Sign: Where the Magic Happens
1. Unleash Your Inner Artist
Fire up your design software (Adobe Illustrator, CorelDRAW, or even your plotter's own software), and let your creativity flow. But remember:
Size matters: Make sure your design fits your vinyl
Keep it simple (at first): Save those intricate designs for when you've got some practice under your belt
Think in layers: If you're going multi-color, separate each hue
2. Dialing in the Perfect Cut
Now's when you tell your plotter exactly how you want it to slice and dice:
Speed: Faster isn't always better (slow and steady wins the race, right?)
Pressure: Adjust based on your vinyl's thickness
Depth: You want to cut the vinyl, not massacre your backing paper
Cutting Time: Where the Rubber Meets the Road
1. The All-Important Test Cut
Before you commit to your full design, do a quick test cut. It's like a dress rehearsal for your vinyl - better to catch any issues now than when you're knee-deep in your project!
2. The Main Event
Once your test cut looks good, it's showtime! Keep an eye on things as your plotter works its magic. If something looks off, don't be afraid to hit pause and tweak your settings.
Weeding and Application: The Home Stretch
1. Weeding: Not Just for Gardeners
Weeding is where you peel away the excess vinyl, leaving only your awesome design. It's oddly satisfying, like peeling off a face mask (but way more useful).
2. Transfer Tape: Your Design's Best Friend
Think of transfer tape as a temporary tattoo for your vinyl design. Smooth it on carefully - no one likes air bubbles!
3. Stick It to 'Em
Now for the grand finale - applying your design. Peel off the backing, place it just right, and use a squeegee to make sure it sticks. When you peel off that transfer tape to reveal your perfect design... chef's kiss!
Pro Tips for Vinyl Virtuosos
Use registration marks for multi-color designs (it's like color-by-numbers for pros)
Keep your plotter happy with regular TLC
Don't be afraid to experiment with different materials (HTV, anyone?)
FAQs: Because You're Curious (And So Are We)
What kinds of vinyl can I use?
The sky's the limit! Try adhesive vinyl for stickers and decals, or heat transfer vinyl (HTV) for sprucing up fabrics.
How often should I change the blade?
When your cuts start looking less than stellar, it's probably blade-changing time.
Can I cut multiple designs at once?
Absolutely! It's like meal prepping, but for vinyl designs.
Help! My cuts aren't precise!
Double-check your vinyl alignment, tweak those cutting settings, and make sure your blade is sharp enough to impress a samurai.
Can I cut fabric with a vinyl plotter?
With the right setup, you bet! Just make sure your plotter is up for the challenge.
Wrapping It Up
Vinyl plotters are like the Swiss Army knives of the sign-making world - versatile, precise, and pretty darn cool. Whether you're crafting signs for your budding business, jazzing up an event, or just indulging your creative side, these machines are your ticket to professional-looking results. So go ahead, give it a whirl - your inner sign-making superstar is waiting to shine!

